Suffragette for a Day
Yesterday I was a suffragette!

Me as a suffragette.
It was Edwardian weekend at Crich Tramway Museum. Being a suffragette was fun, we sang rousing songs (the first two of these), had speeches and some chained themselves to the railings. The weather was great, if a little warm, but the outfit was cooler to wear than some re-enactment kit I have worn, and it was not inauthentic to eat ice-cream 🙂

Suffragette rally.
Also it was lovely to be able to wear some heirlooms. The skirt belonged to my great-grandmother and the bag and white feathers in my hat might have been hers as well (my Mum wasn’t sure whose they had been when she gave them to me).
I was pleased to have managed to wear suffragette colours as well: green, white and violet, which could stand for Give Women the Vote, or the green represents hope, white: purity and purple: freedom. I have a green belt on as well as the scarf keeping my hat from blowing off (useful on the open tram ride we took) and a green malachite necklace; white skirt, blouse and gloves; the purple is present, but less visible, I have a purple brooch, stockings and petticoat. The parasol is purple and green shot silk and is a real antique one, as is most of the outfit.
I know some people don’t approve of wearing real antiques, but I was careful and I don’t do it often. The stockings and silk petticoat came from ebay and just might have been worn by a real suffragette once! The blouse I got from an antique fair for just £5 as it had no buttons, a torn seam and some old mends. I love old mends, it makes a thing feel real, that it was worn by a real person once. I mended the tear and added some shell buttons. I think it fits me quite well. Nothing got harmed, although the hem of the skirt is now a little dusty, which happened. I am sure it will brush off.
The scarf and hat were from a charity shop and I trimmed the hat myself, as I will detail later in the post as it is my entry for the current HSF challenge, along with the mended blouse.
Lots of people took my photo, I felt like quite a celebrity, especially when I was asked to pose in a vintage car and pretend to drive it!

And it’s hey ho for the open road! Being an Edwardian Lady motorist.
Shame I couldn’t really have a go 🙂
We did get to ride the trams, including a Victorian one. It was not easy to get up the high steps, especially in my outfit, but worth it as the views were lovely. Sorry for the lack of photos, but the museum website which I linked to above will have some. There was lots going on. I enjoyed the fashion show and chatting to other Edwardians, but I didn’t get to see most of it as I get tired and the cobbles were hard to walk on. We’ll just have to go back another day.
And now for my entry to the HSF challenge #13: Under $10
I got this hat from a charity shop for under £4:

Hat before trimming.
It looked a suitable shape and the straw looked plausible for the period based on pictures I’ve seen online.
I used scraps of fabric from old projects over ten years ago (never throw away anything which might be useful!) and a ribbon from stash which I bought for another project and didn’t use so I could that part as free.
The purple feather I bought from an antique shop the other day as it was the perfect colour, for £2, and then spent the whole day worrying about whether I had lost it. Just as well I was fretting over it because I did lose it! I didn’t end up having time to properly attach it, I just shoved it into the layers of fabric trim, which were only fixed in place with safety pins anyway, so I was lucky it stayed together at all. Fortunately someone found the feather and returned it to me when we had gone looking for it. The white feathers as I mentioned above were also heirlooms so I’m counting those as free as well.
The fake violets came with a lace cape I bought off ebay, they were a bonus so I call those free as well, since the cape was a bargain price anyway. The cape was probably 1890s, whether the flowers date from then or almost any time after I have no idea but they seemed quite plausible.

Suffragette hat trimmed.
And the facts:
Challenge: #13 – Under $10
Fabric: straw hat; green cotton velvet scrap; white linen scrap; purple velvet ribbon from stash; feathers.
Pattern: none.
Year: Edwardian, first decade of 20th century.
Notions: safety pins.
How historically accurate is it? Not very. The hat is plausible and has some age, the scraps are natural fibres, the ribbon is wrong, the feathers are fine, especially the white ones which might even be from the era. I mackled it together in a more slipshod way than I feel they would have done. I’d give it 50%.
Hours to complete: Less than one: gathering the materials probably took longer than putting it together.
First worn: Yay – for the first time I can say I wore it to en event! Yesterday, to the Edwardian event at Crich Tramway Museum.
Total cost: about $10 – I was guesstimating £6 would equate, so it might be cents over, but I feel it is in the spirit of the challenge.
Second entry – mended blouse:

Mended blouse.
I sewed on the buttons and mended the side seam which was torn for 2.5″ – the mends next to the buttons are original.
Challenge: #13 – Under $10
Fabric: fine cotton. Lawn, muslin, voile? It’s lovely anyway.
Pattern: it was already made, this is mending.
Year: I reckon it is more second decade of the 20th century than first, by the collar, but it is around then as it has a waist tie. It looks home-made.
Notions: white thread; shell buttons from antique fair.
How historically accurate is it? Genuine, but my mend was probably not up to their standard. The buttons are possible, though they could be almost any age.
Hours to complete: About one, watching telly.
First worn: Again to the Edwardian event at Crich Tramway Museum yesterday (their definition also covered WWI)
Total cost: £5 for blouse; buttons were part of a job lot, call it 10p each. So £5.40 which is firmly under $10.
HSF 11: The Politics of Fashion – 1920s Swimsuit
This challenge was about how politics has influenced fashion (or vice versa) which is a very interesting theme. I had several ideas which would have been fun to make, but I realised I had the perfect project which needed to be done anyway.
The 20s swimsuit I made for the last challenge did not utilise the whole pattern, which also had a skirt.

The info from the pattern I used.
I had not needed the skirt for my art challenge as my inspiration painting showed a bather in a skirtless suit. But ultimately I do want to try it out both with the skirt and without, to compare how much resistance a skirt adds when swimming. So what’s political about a swimsuit? I think if the law feels the need to regulate something, it counts as political!

In 1922 Col. Sherrell, Supt. of Public Buildings and Grounds, has issued an order that bathing suits at the Washington bathing beach must not be over six inches above the knee
The first bathing garments for women covered a lot more, as much as normal clothes, except that the existence of legs was visible. Early ones were based on the Bloomer costume, which links swimming to feminism in the mid-19th century. People assert that these outfits were not for actual swimming, which is one thing I want to test by making a variety of them. For example, I think it would be possible to swim in these:

Bathing outfits from 1868
Of course it would be harder to swim in those than in something more streamlined. Annette Kellerman was an Australian expert swimmer who campaigned for women in the Northern hemisphere to be allowed to wear the kind of swimsuit Australian women had been wearing for decades for competitive swimming, which was like a man’s (except that many men preferred to swim nude). She was famously arrested in 1907 for wearing this:

Annette Kellerman’s famously ‘indecent’ swimming costume.
My swimming attire should have been safe to wear even without the skirt, but I wouldn’t have wanted to risk this:
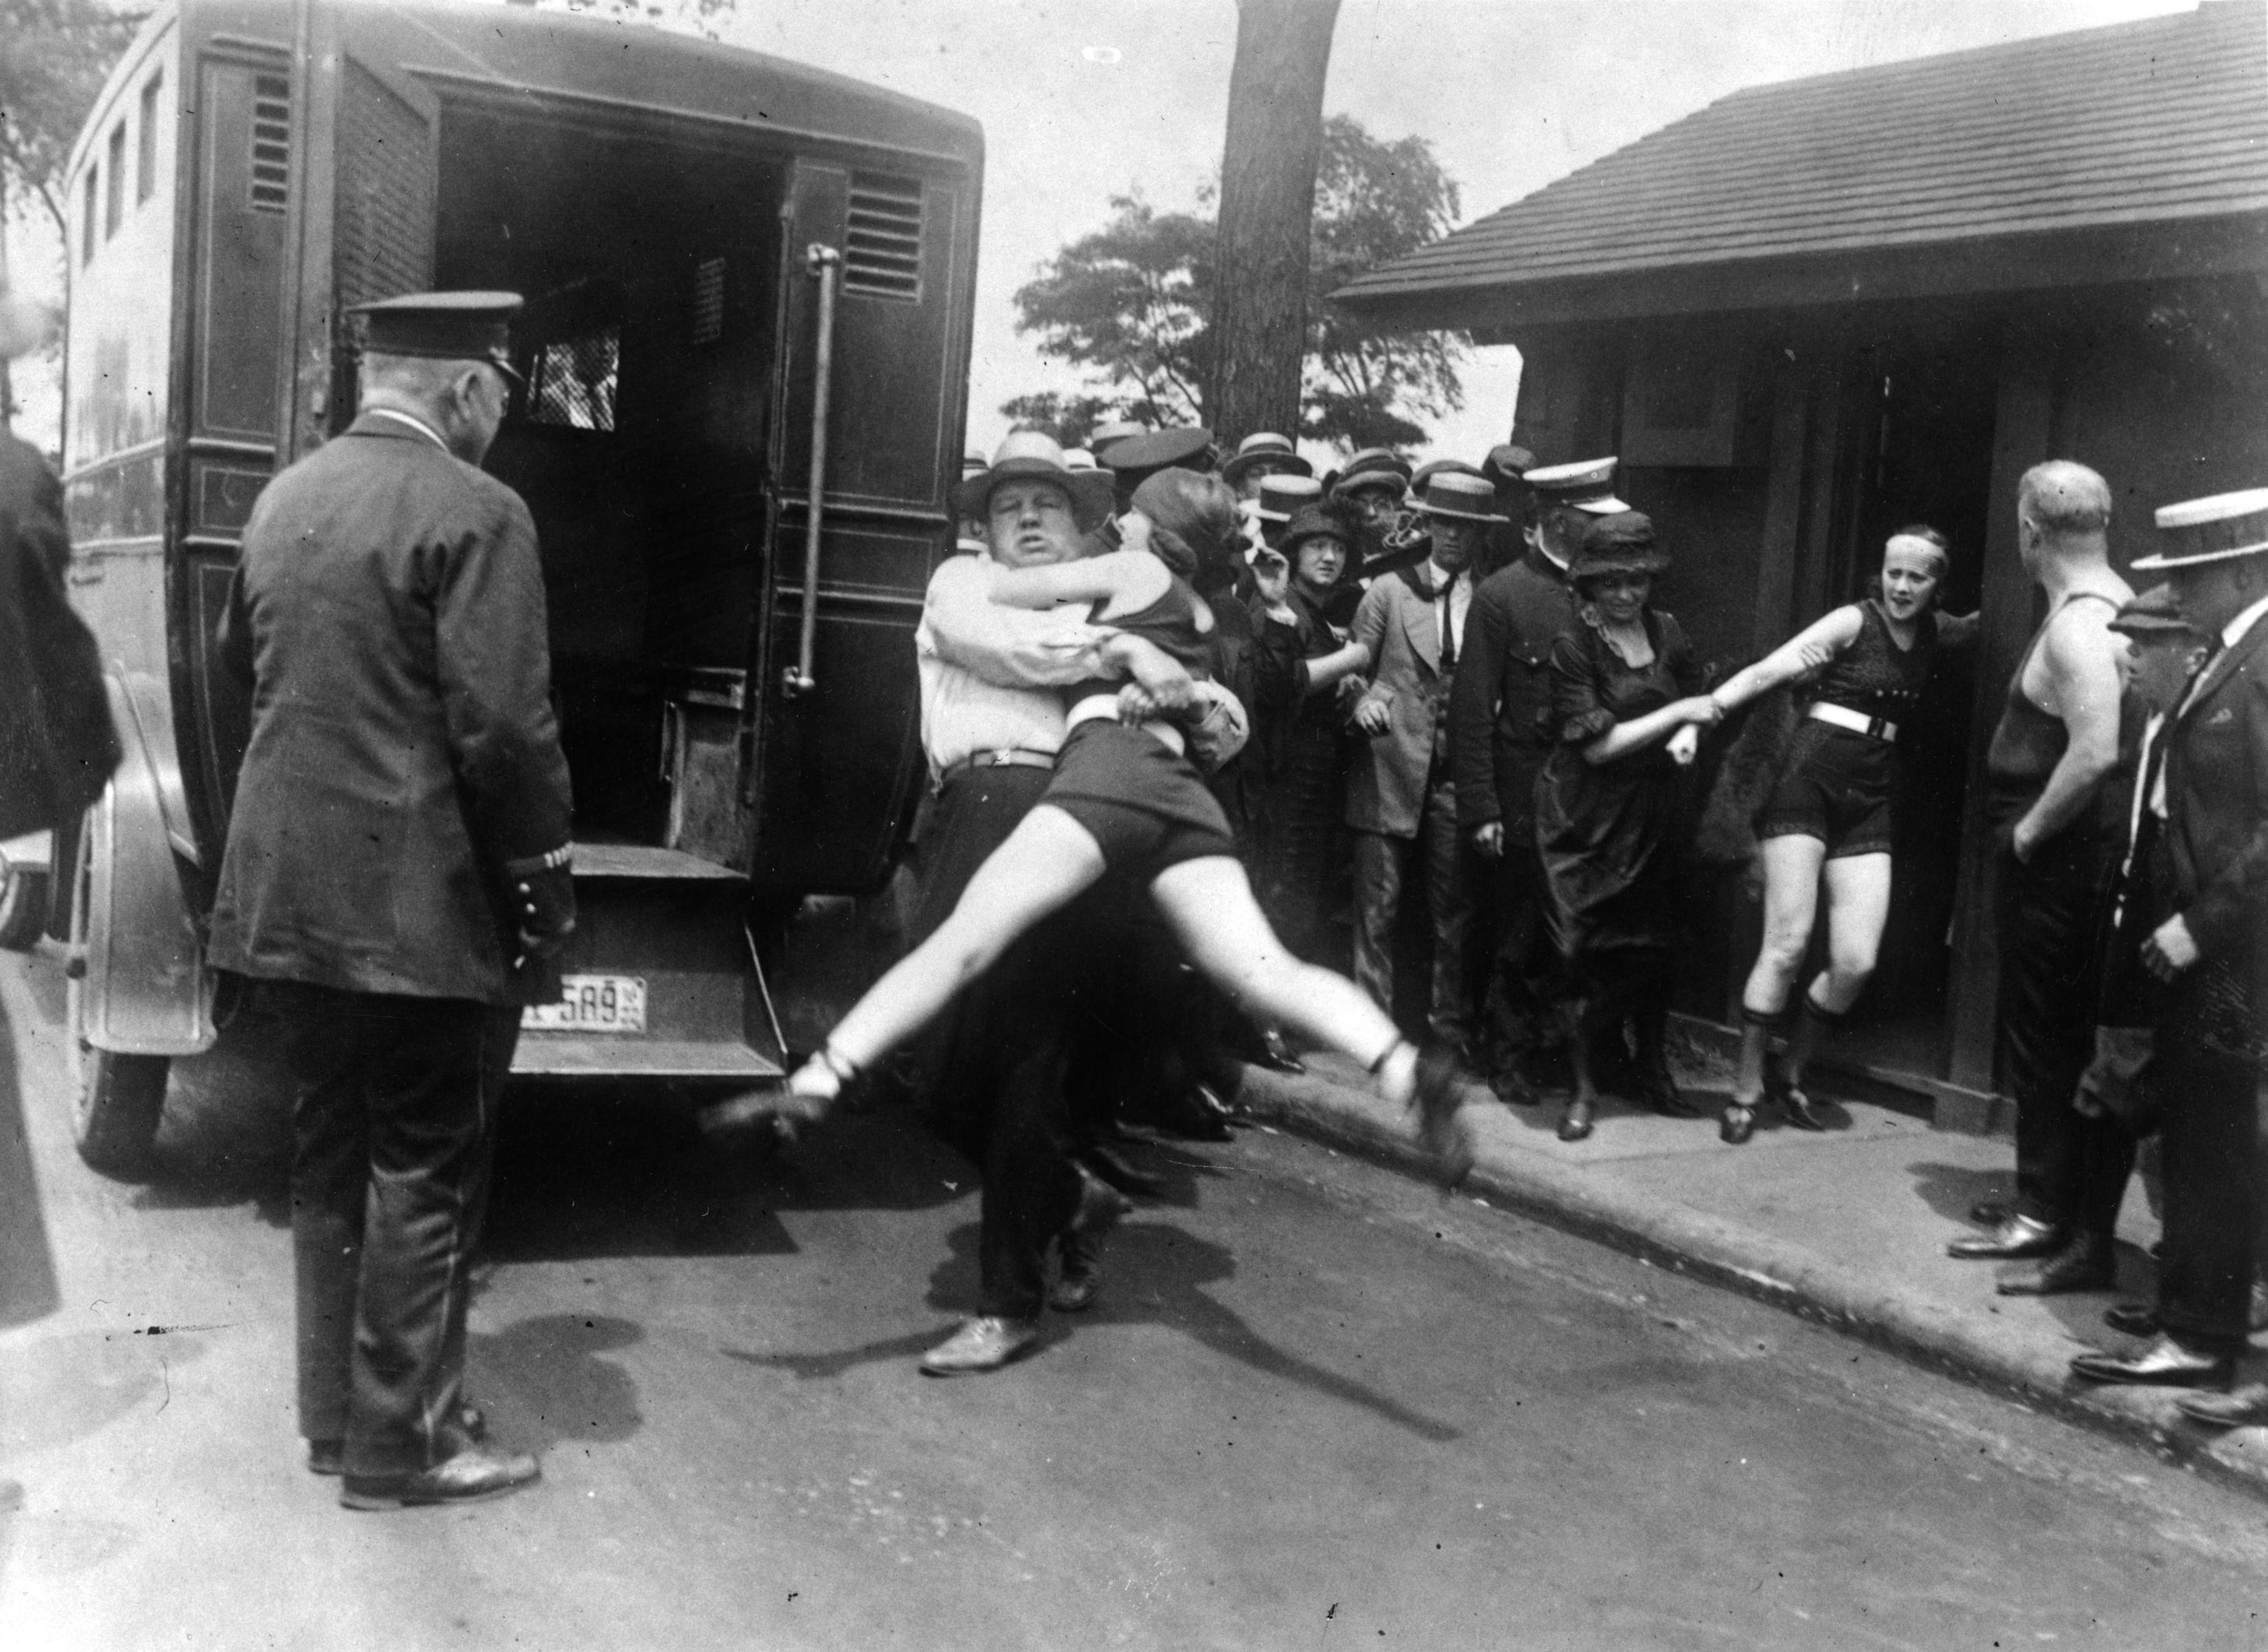
Women arrested in Chicago 1922 for failing to cover their legs decently.
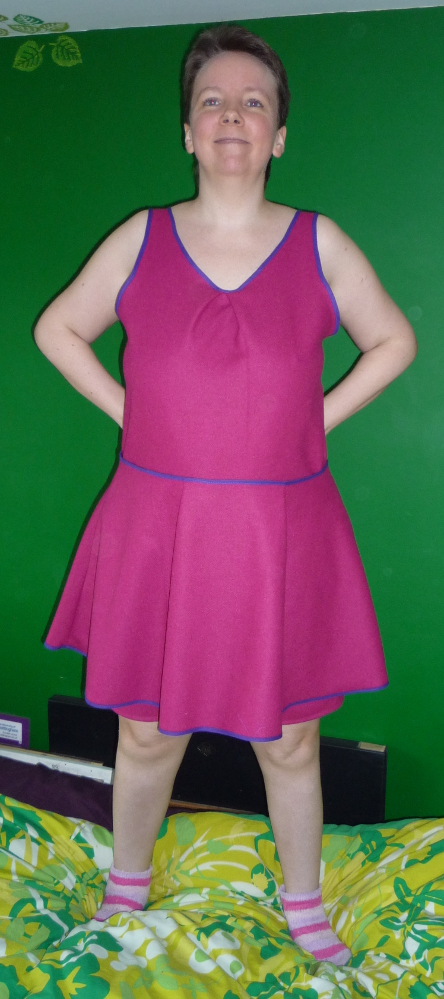
My finished 1920s swimsuit.
I think this is decent enough!
For more pictures of swimming in the past see my Pinterest board ‘A Swim‘.
I’m also rather pleased with how it turned out. The purple bias binding I added could be a nod in the direction of suffragette colours too, especially since there is green and white in the background as well 🙂
I did have to tweak the pattern a bit. I changed the neckline to fit the art for the last challenge (this might be the reason why I then had to put a pleat in the front as otherwise it fell off the shoulders and then I might be arrested even now!!) and I also made both the skirt and the legs shorter, the legs by about 6″ and the skirt by 3″, but that could look longer or shorter if I wore it lower or higher on my waist.
The Challenge: #11 Politics of Fashion
Fabric: <1m of the same wool as last time
Pattern: a copy of an original pattern from ‘Mode Pratique’ from my favourite ebay seller (her blog)
Year: 1924, May 3rd to be precise!
Notions: thread, cotton bias binding and a button.
How historically accurate is it? Not sure, it is wool as called for by the pattern, but possibly a little thicker than it should be. Bias binding and a sewing machine are fine for the 1920s, but I just sewed it how I sew rather than checking if I used period techniques. Pattern is original.
Hours to complete: I didn’t count again, only a few.
First worn: Just for photos
Total cost: <£10.00 for the skirt, £26 for the whole outfit including pattern, fabric and notions.
Now I just need to try it out! Where’s the water?

Ready to dive, but no water yet!
Who knew how political swimsuits would turn out to be? And that’s long before the bikini.
HSF 10: Art
This fortnight’s challenge is to make something inspired by a work of art. I have been wanting to get started on some of my swimsuits from the past, so I decided to find some art to fit what I wanted to make. I wanted to start with the easiest pattern as well, which is one I have from the 1920s. I found quite a few possible paintings, but not one to match any wool I had in my stash, what a shame, I had to go shopping 🙂
I found this fabulous fuchsia wool which was a close enough match to this Picasso painting, even though it is from 1919 and thus a few years before my pattern, I decided it was close enough, especially as the pattern was, if anything, more conservative than the art. The painting undoubtedly shows jersey rather than woven wool, but my pattern called for serge, which was a very traditional fabric for that use. I think my fuchsia might be a little on the thick side, though it is not too bad. I did alter the pattern as the art has no skirt and I had to shorten the legs quite a bit and change the neckline.
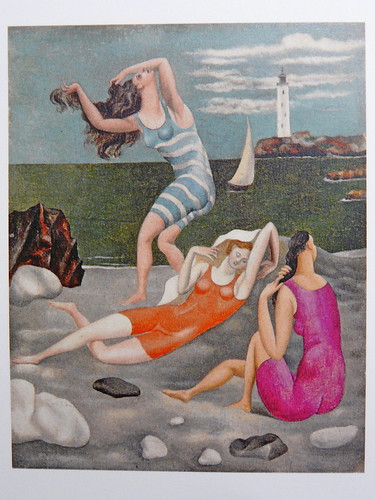
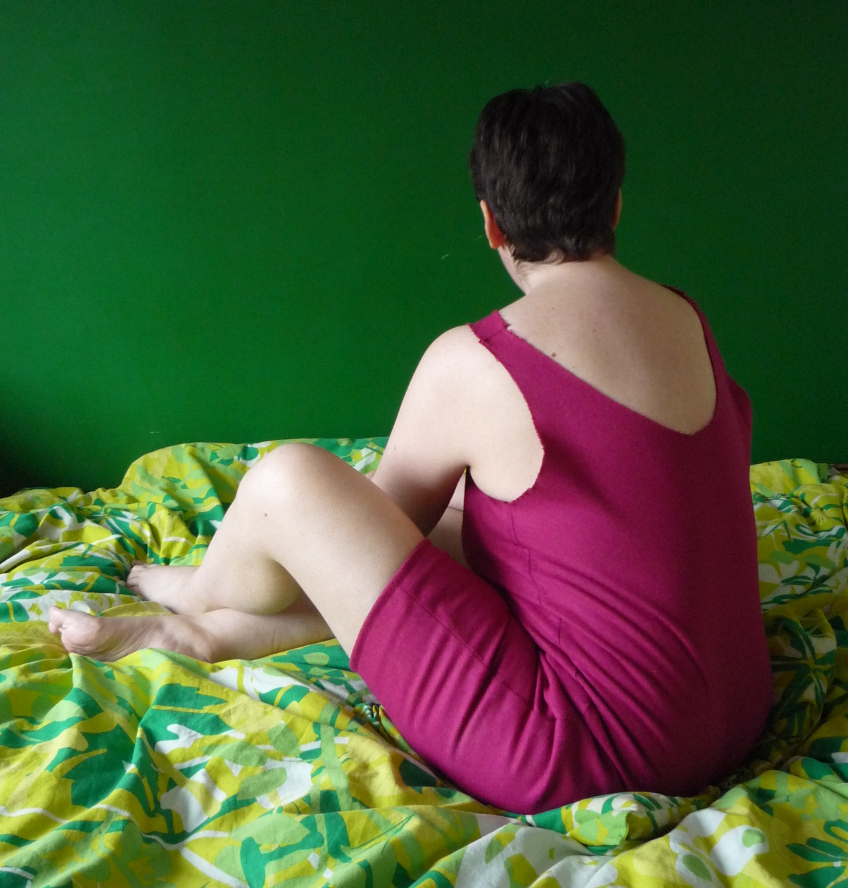
Me as a Picasso bather!
I want to try it out swimming! Once I have, I want to add the skirt and compare to see how much drag that adds. I also need to put bias binding around the neck and arm holes, but I thought I’d do the picture first because my bias trim is black and it will be more like the art without it.
I don’t look much like the painting, but then I’m not too worried that I don’t look a Picasso! 😉 (or should I type .)’ as a face?!)
It’s not a stretchy swimsuit so it is not best suited to this kind of position. I am not going to share more photos until the trim is finished, maybe not until I have swim-tested it. When I do I’ll give more about the pattern, but I’m a bit tired now so I just want to get my entry post finished.
The Challenge: #10 Art
Inspiration: Picasso, ‘The Bathers’ 1919
Fabric: pure wool £10/m
Pattern: a copy of an original pattern from the 1920s
Year: 1920s
Notions: thread and there will be bias binding
How historically accurate is it? accurate pattern, material plausible but possibly slightly thick, used a sewing machine but that’s fine for 20th century. 80%?
Hours to complete? I always forget to count, it wasn’t bad, but I did have to trace the pattern and make a toile, so several.
First worn: today for photo
Total cost: under £15 for the wool, another pound when I add the bias tape, will use the full £20 of wool when I add the skirt
HSF 9: Black and White
Sorry I’ve been rubbish at updating again. No excuses and it’s not as if I haven’t had entries for the last 2 challenges, I just haven’t got round to blogging them 😦
Even this is just a short placeholder type entry as the deadline is today and I haven’t really finished, but I wanted to post my progress so far and try to get back onto some kind of track!
For the black and white challenge I found some lovely thick warm wool, fuzzy one side, which I thought would make a perfect bathing cloak to wrap round me after a dip in the sea in the historical swimming attire I plan to make and test soon. I used the method in the lovely and useful book I recently acquired, Frances Grimble’s Fashions of the Gilded Age Volume 2 which has lots of lovely patterns and info. Or at least I used a sort of mish mash of two patterns, one measured and one based on a sloper, except I haven’t done one yet so I just used a t-shirt which fits snugly and tried it out on an old fleece blanket. It worked very nicely so I went with it.

My cloak cutting plan (upside down I suppose)
This pic shows the fabric laid out with my cutting plan laid out. I’m not being perfectionist in my method today…
Of course Pebble ‘helped’.

Pebble ‘helping’.
Cats are so kind and generous in ‘helping’ with sewing projects. Here she is kindly sitting right where I need to cut out so I don’t try to do too much at once without taking a cat break. It is important to take frequent breaks to avoid getting tired and making silly mistakes.

Pebble likes to play with string.
Here she has allowed me to cut out the neck hole, but I clearly need to play with her before being allowed to sew up the shoulder seams. She wouldn’t want me to get them inside out. And that bit of frayed off weft is ideal as a cat toy.
Eventually I was allowed to get to the sewing, but I did have to resort to a shiny ball – as soon as I put the string down she leapt back onto the cloth! But shiny balls are her one weakness, which I was able to exploit to distract her, she just has to chase a shiny ball (scrunched up foil wrapping from a chocolate mint) by which method I proved to her that my mind was alert enough to be trusted with the sewing machine and I could proceed to the next level.
However, I am unable to complete the project today because I will need some black bias binding and I only have lilac, so I have to go to the sewing shop, what a hardship 🙂

The cloak laid out with buttons.
I am rather pleased with it, it sits happily and is very voluminous and warm, and quite smart. I almost feel unsure about getting wet from swimming as I might want to just wear it as a winter coat! I will need to add hand slits though, as well as binding the edges and actually sewing those button on and doing the buttonholes. I shall make another post when it is all finished.
But my partial progress report is:
The Challenge: #9 – Black & White
Fabric: 2m of lovely thick wool.
Pattern: method from Frances Grimble’s Fashions of the Gilded Age Vol 2
Year: 1877-82 for the method I used, but bathing cloaks are in use before and after that.
Notions: a bit of thread, some buttons, and I will need bias binding.
How historically accurate is it? Not sure, it is pure wool and late enough for a sewing machine to be OK, but the buttons I have are plastic (I may change them later) 80%?
Hours to complete: I always forget to measure this. I made the neck hole pattern and toile yesterday afternoon in an hour or so and spent longer dithering about whether to use all the fabric or make it shorter than actually cutting and sewing it today. I went with the whole lot, why skimp, even if it is a bit heavy? I can always cut it down if it bugs me. But it is not finished yet of course
First worn: Not yet.
Total cost: £20.00 for the fabric, buttons from stash, plus whatever the bias binding costs, not much.
HSF 6: Fairytale Princess and the Pea Edwardian Dressing Gown
So the next challenge is due today and I am on time! Hurrah, because I thought it was due yesterday and that I was late 🙂
Challenge 6 is Fairytale and we have been asked to make something inspired by our favourite fairytale set in a historic period. I used to love reading fairytales as a child, but I never find it easy to pick a favourite. I always related to Princess and the Pea though, because I don’t sleep well if I’m at all uncomfortable and my family used to call me the Pea Princess, so that one seemed appropriate.
I found a pattern on ebay for an Edwardian dressing gown, which was perfect:

What the Edwardian Robe de Chambre is supposed to look like.
I love using original patterns 🙂 and this one was from my favourite seller, who has a very interesting blog about these old patterns, including advice how to use them and how to use the mad jigsaw ones as well.
Although I had several stash fabrics which would have worked nicely, I didn’t have enough of any of them, so I had to buy some (such a hardship 😉 ) but it had to look regal and be something I could enjoy wearing as an actual dressing gown. I had an old orange cotton flannelette sheet which has made a lovely usable toile, but it was not even a little bit regal.
I was glad I made a toile, as although it was plenty voluminous enough, it did have rather snug armholes and I like my dressing gowns to have loose arm holes, so I adjusted that. It was also useful to practice the gathers on a nice easy fabric.
What I wanted most was purple velvet and the third place I went had some. In fact I had the choice between cotton velvet at £7/m or artificial stuff at £3/m and I regretted being a cheapskate as soon as I tried cutting it out. The fabric behaved very well and I had no issues with creep or other things which are supposed to be difficult with velvet, but it made so much static I am concerned I will be in a permanent state of shock when I wear it! Apart from that it has been easy to work with, despite also being a knitted stretchy fabric, which is also supposed to present challenges.
My cat, Pebble, helped me cut it out by sitting on the fabric and nuzzling my face whenever I bent down to adjust the pattern pieces. They were rather large so I had to use the floor. She was so helpful I had to pick her up and go take a cuddle break, sorry I didn’t take any pictures.
It went together very easily and I enjoyed making it (both of them) except the very last step. The lace was easy enough to sew onto the sleeves as I put it on flat and added a cord to make an adjustable gather, so I can choose to wear them loose if it is warm. But the lace around the collar gave me a lot of trouble. I think it must be at least partly because it was the last step and I have a bit of a mental block about finishing things (which is one reason the HSF is so useful for me, it has made me finish stuff way better than last year’s feeble attempt at a Year of Finishing Stuff!)
But partly it is because I got a cold and also got tired going out for a lovely Mothers’ Day outing where we took Mum to a historical gardens (and tea room of course) followed by a big dinner, which we all enjoyed but did wear me out as I have such poor energy levels with my arthritis. So I had to rest all day Sunday and did nothing all day, hoping I would be better by Monday, but I wasn’t. I did try to hand sew the lace on, but made such a horrible job of the first few inches I ripped it out and went back to bed, giving up on getting the challenge done in time. So I was very pleased to discover today that I am not late after all 😀
Today I am back to what passes as normal for me, and was able to easily machine sew the lace onto the collar. No problem. It just goes to show that it really is counterproductive to try and sew when tired and ill. And here it is!

Me as the Pea Princess. I was trying to look sleepy (that’s my excuse!)
Tim helped with the photos. He had to be very patient as I hate having my photo taken and had to be very fussy about showing the garment off as well as looking my best. I ran up the little matching slippers on Friday, using a Victorian bathing shoe pattern from 1877 (I’m getting a bit ahead now as the next challenge is tops and toes!) I’m also wearing an original petticoat I got from an antique shop.
I’m not tall, so I don’t know why the drawing shows it going down to the floor. It is longer at the back, but it doesn’t trail, which I am glad of for practical reasons. Not least because the friction on the carpets would build up that static charge…
The Challenge: 6 Fairytale
Fabric: artificial velvet
Pattern: Petit Echo de la Mode
Year: 1906
Notions: modern machine lace
How historically accurate is it? Pattern totally, fabrics not at all, techniques modern.
Hours to complete: didn’t count, about a week.
First worn: today for photos
Total cost: about £17
HSF 5 Bodice
So these are going to go up out of order, because I’m already late on 4 and I don’t want to be late on 5. I was not sure what to do for this one at first. The Edwardian blouse is way too complicated for my current skill set, sorry to those who helped me with the translation and to anyone who was looking forward to seeing it. It would have looked horrible so just be glad I spared you that. I may make it some other time when my skill set has improved – it has been improving even just this week, so we live in hope.
What I have made has taken me somewhat by surprise. I always assumed that the 1920s were off limits to someone like me, who has curves rather than the straight up and down androgynous look stereotypical of the era. But I developed the urge to make a Victorian swimsuit.
Yeah, surely you can see the link between those two sentences? Isn’t it blindingly obvious? No, fair enough. Well, basically, as I was searching the web for a Victorian swimsuit pattern, I found a 20s one, which I bought off ebay for a very reasonable sum. It’s a photocopy of one of those mad sheets they used to have in magazines where all the pattern pieces for several garments are drawn on top of each other.

1920s pattern sheet.
You can see the swimsuit at the bottom left. I made a toile of the top and pantaloons part of the swimsuit and it fits nicely and I really like it! So I thought, maybe those other patterns on the sheet might not go to waste. When I decided the Edwardian blouse was going to be a bad idea, I decided to try making a 20s top instead. Nice and simple, just 2 pieces, a front and a back.
I traced the pattern, cut it out, sewed it together and Bob’s your uncle. Well, he’s my uncle anyway. Seriously, I do actually have an uncle called Bob; that expression puzzled me as a child, how people knew that about me 🙂 The dress drawn at the top gave me the pattern I used, they only give the outline for the top part anyway, the skirts are just two rectangles sewn on. I think I will make that whole dress another time as I rather like it now.

Bad picture of my 1920s style top.
So now I plan to make lots of 20s stuff as it’s really comfortable and not unflattering like I expected. Of course it’s modern fabric, so not really great for the challenge. And I haven’t finished the neck or sleeves off properly because it’s a non-fray fabric and I can’t find the right colour lace to edge it with. It would be a sort of OK, but only just.
Except it does have a period correct support garment under it. Which incidentally makes it look slightly too large now as the purpose of the period correct undergarment is to reduce, which it has by nearly 2 inches!
I was browsing ebay and came across a pattern for some 20s underwear in my size. Not cheap, but I really wanted to give it a go, and it has instructions in English! Quite comprehensive too.

The 1920s underwear pattern I bought.
As soon as it came through my letterbox I read it in detail and that very morning cut out the brassiere pattern from some calico (apparently they didn’t call it a bra yet). I pinned the darts as I drank my midday coffee and then I sewed them and tried it on and kept at it until it was nearly finished the same day!
The instructions were very clear and the only tweaking I had to do was because their sizing does not take cup size into account, so the band needed to be tighter. Why are patterns sized off a squashable thing like a bust rather than a stable and more useful measurement like the shoulder for example? My 50s sewing book says the shoulder measurement is more important. But anyway, I’d have had to either reduce the band or increase the bust, and it worked out fine.
I didn’t get much done the next day as I went to the fabric store 🙂 but I finished it today! I have to admit I did cheat a little bit. The pattern calls for hooks and eyes to close it and I did indeed use hooks and eyes, but… I just chopped them off an old sports bra.
This one, being my first, is kind of like a functioning toile, so the finishing is strong but not as neat as it should be and the materials are cheap. I’m counting it because it is functional and wearable and my plan is to make one which is actually less authentic because although it’s not as uncomfortable as it might be, I still prefer a stretchy bra.

My cheat.
I was glad of the cheat because when I first put it on, having just fixed it with a safety pin before, it was way too tight! So I removed the hooks and resewed them further out and also slanted so the band was tighter than the rest of the bra. You can see where I first sewed it as well as the unconventional way I did it – so glad it wasn’t a lot of hand sewn hooks I had to move! The bottom moved out 1cm, the top about 3cm.

The outline it gives is quite different than a modern one.
By the way, this post is taking longer to write than it should because WordPress is mucking about 😦 I have noticed it being a bit problematic of late, especially in chrome. Nearly done now, just the money shot, which I am a bit loathe to post because although I am very pleased with the result, it is basically not something I usually share in so public a forum, I don’t even wear a bikini! As you can see, the intention is quite the opposite of lift and separate!
The Challenge: Bodice
Fabric: Calico, with some kind of chenille ribbon I got cheap in a bundle.
Pattern: Pink Domino, off ebay UK, it’s basically a copy of an original.
Year: 1920s
Notions: hooks and eyes off an old sports bra.
How historically accurate is it? The pattern is original, calico is acceptable, the chenille ribbon is modern and the fastening a total cheat, so maybe 75%.
Hours to complete: A bit over a day, but not a whole one.
First worn: For photos today.
Total cost: All from stash, £14 for the pattern so under £15, but I will use the pattern again and make the bloomers, so less really.
A French Edwardian blouse pattern
I ought to have posted by now with my finished HSF challenge 4 but I have not yet finished it. It is nearly done, but now I’ve missed the deadline I don’t feel like busting a gut on it, so it is happily being knitted as a TV project rather than an every minute I can knit project.
I have been thinking about the next one though, which is a bodice of some kind. As it happens, my unfinished challenge 4 could count as it is a vest, but I have this original Edwardian pattern I bought on ebay.

1904 French blouse
It’s in French, which I am not very good at, but I’ve had a stab with the ‘help’ of Google translate. I say help because it has tried to tell me one of my patterns should be the size of a single room, rather than cut in one piece 😀 but I have also had the offer of help from real French speakers who also do the HSF (merci boucoup!) so I am going to post the instructions here with google’s translation which I have cleaned up a little and commented on. I don’t know why the font changes size, except word press doesn’t always like formatting copied and pasted from word processors, but maybe it is only looking odd on my screen?

The instructions in their original print.
Ce boléro ne sera pas doublé sauf l’empiècement,le col et les poignets qui seront doublés d’une percale.
This bolero will not be doubled except the yoke, collar and cuffs to be lined with a percale (which is a tightly woven cotton, often used for bed sheets).
Couper une hauteur pour les devants et une hauteur pour le dos. Les devants seront coupés en plaçant le milieu du devant le long de la lisière du linon. Le lé du dos sera plié en deux dans le sens de la longeur et le milieu du dos placé le long de ce pli pour avoir le dos sans couture.
Cutting height for front and back height. The front will be cut by placing the center front along the edge of the lawn. The back is folded in half along the length and the middle back placed along the crease to get back seamlessly.
Les empiècements 3 et 4 seront coupés doubles, celui du dos sans couture derrière. Laisser un cm de tissu tout autour pour prendre les coutures. Chaque manche est coupée dans une largeur de linon; le pointillé du croquis sera droit til. Le poignet et le col seront coupés en linon et en percale comme doublure. Le col sera sans couture derrière.
Yokes 3 and 4 will double cut, the back seamless behind. Leave a cm of fabric around to make the seams. Each round is cut in a wide lawn, dotted sketch will til law (!!! I think it must mean something like that the yoke is edged, perhaps with lace, as shown on the drawing shaded with dots). Wrist and neck will be cut and percale linen as lining. The neck is seamless behind.
Apprêter l’empiècement, assembler les coutures d’épaule indiquées par un cran sur le croquis. Essayer et échancrer l’encolure sur la personne.
Prepare yoke, assemble the shoulder seams indicated by a notch on the sketch. Try échancrer and neck on the person.
La doublure sera légèrement soutenue sous l’empiècement. Faire 3 rangs de fronces au haut et 3 rangs au bas des devants. Ces fronces seront, la première, au bord de la couture, les autres espacées de 1cm. Ces fronces sont arrêtées à environ 5cm du milieu de chaque devant.
The lining is slightly supported under the yoke. Make 3 rows of ruffles at the top and bottom 3 rows of the front. These creases are, first, to the edge of the seam, the other spaced 1cm. These gathers are stopped at about 5cm middle of each front.
Le dos sera également garni de 3 rangs de fronces en haut et en bas correspondant à celles des devants. Bàtir les coutures de dessons de bras. Bâtir le boléro à l’empiècement. Tirer les fronces du bas à la largeur de la taille de la personne, et celles du haut à la largeur de l’empiècement. Essayer, mettre autour du bolèro une bande linon droit fil sur laquelle sera appliqué l’entre-deux.
The back is also lined with three rows of ruffles at the top and bottom corresponding to those of the front. Make the underarm seams. Construct the bolero yoke. Make the bottom ruching to the width of the size of the person, and those of the top to the width of the insert. Try putting a band around the Bolero linen thread on which law will be applied between the two.
Poser l’entre-deux sur l’empiècement, les devants et le bas du boléro. L’on remarquera qu’entre les deux rangs d’entre-deux du devant se trouve un espace formant gilet. Au milieu des devants seront des boutons et des boutonnières fermant le boléro. La garniture est complétée devant par une cravate en ruban fantaisie et deux losanges dentelle dans lesquels passera le ruban.
Put between the two (layers of the?) yoke, the front and the bottom of bolero(?). It is noted that between the two rows of two-front is a space forming a waistcoat. Amid will lead buttons and buttonholes closing the bolero (I assume they are saying the opening here should have a strip of reinforced fabric or something, as the picture seems to indicate more than just buttons applied to the single layer of lawn, which would not be strong enough?). The trim is complemented by a front tie fancy lace ribbon and two diamonds where will the ribbon (again, thank you google for making perfect sense ![]() but it seems there is a wide ribbon tied round the neck with two lozenges of lace applied to it, from the picture. I would make a stab at the translation being ‘the trim is completed to the front with a tie of fancy ribbon with two lozenges of lace.
but it seems there is a wide ribbon tied round the neck with two lozenges of lace applied to it, from the picture. I would make a stab at the translation being ‘the trim is completed to the front with a tie of fancy ribbon with two lozenges of lace.
L’empiècement est garni de losanges comme le montre la figurine. Le col rabattu est uni. La manche est froncée en haut en le bas. Les fronces du bas sont ramenées à la largeur du poignet. Celui-ci est garni d’entre-deux et de losanges. La manche toute terminée sera montée au boléro. Ce boléro peut être fait en toile, dans ce cas les fronces seront remplacées par des petits plis dans le sens de la longueur. Rappelons qu’il est bon de décatir le tissu avant de l’employer pour éviter qu’il rétrécisse au premier blanchissage.
The yoke is trimmed with lozenges, as shown in figure. The turndown collar is attached. The sleeve is gathered up in the bottom. The gathers at the bottom are reduced to the width of the wrist. This is garnished with lozenges. The sleeve will be installed to finish the bolero. This can be done Bolero fabric(??? are you suggesting an alternate fabric here?), in this case the pleats are replaced by small folds in the length direction. Remember, it is good to (pre-wash, I assume) fabric before using it to prevent it from shrinking in the first laundering.
HSF Challenge 3: Pink
Technically I am a day late posting this, but I did finish making it in time. Some things happen which are more important. But life goes on and so does crafting, so here is my pink challenge.
Like many other HSFers I am not really into pink. But when I was browsing the historical knitting and crochet patterns I linked to last time, I came across this ideal pattern with dangling fuchsia flowers. Fuchsias are pink, right, they even have a whole shade of pink named after them, fuchsia pink. Perfect. Especially as I do like the strong bright pinks like this. The pattern is from 1850, from this book:
http://www.antiquepatternlibrary.org/pub/PDF/6-JA008Riego7.pdf

Victorian crochet bag with fuchsias as tassels.
How cute is that? I love it! I wanted to make the whole bag, but things didn’t work out that way. Not least because we have recently “upgraded” to Windows 7 which is not properly compatible with the printer, so even though I tried twice to make a printout of the instructions (8 pages, so I wanted 4 per sheet double sided) I have not yet managed! It won’t print from the pdf reader, neither will it print from the open office version of powerpoint. I have some more ideas, but it all takes time and effort, so I just copied out the instructions for the flowers and worked from notes. I plan on making the bag itself for a future challenge.
So I grabbed the nearest close enough ball of DK acrylic and a hook and gave it a go. Here is my version of the instructions (UK terms) in case anyone wants to try it:
1st 4 ch, join, 2dc in each ch = 8sts.
2nd 2dc in each dc = 16sts.
3rd and 4th 1dc in each dc = 16sts.
5th dc2tog, 2dc, 4 times = 12sts.
6th dc2tog, dc, 4x = 8sts.
7th 3ch, 2dc, 4x = 4 chsps.
8th 1ch, skip 1, (2tr, 3ch, 2tr) into 3ch space from prev round, 1ch, sk1, 1dc into gap between dcs 4x
9th 3ch, sk2, 2tr into the 3ch space, 3ch, turn, sk2, 1dc into the 3ch sp, turn, 2tr into the first 3chsp with the first 2tr, 3ch, sk2, 1dc into the 1ch, sk1, 1dc into the 1ch, 4x and fasten off.
The first 8 rounds went fine, but I just could not figure out the final one. The problem is that you get a totally different effect depending on which way you turn, and it didn’t specify. My first one eventually came out fine, but when I came to do the next a few days later I had forgotten what I did and it came out different! Basically, if you want the tips of the petals to point down, like in the picture, you turn the left side of the work towards you, then away from you when you turn back, and if you want the tips pointing upwards then you turn the right side of the work towards you, then away to turn back.
I hope that made sense! If not, just play around yourself until you get it 🙂

My 4 Victorian fuchsias.
The first one I made is the second from the left, using DK and about a 4.5mm hook (it was an antique bone one so that is a guess). The next one is second from the right. It is also DK, but wool, and with a much smaller hook. You can see the petal tips point upwards! I only got around to adding the yellow tassel stamens to the first one, but I think they do help, otherwise the thing tends to look a bit like a 4 legged octopus…
Yes, the botanical accuracy leaves a little to be desired. Fuchsias are much narrower than these very rotund flowers and usually two tone. Some have drooping petals and some turning up, so either of those is fine, at least! And having just checked, I realise the stamens are not yellow at all. Ho hum.
The pattern specifies ‘needle no.20, bell gauge’ (yes, they used to call crochet hooks needles!) which is quite fun as I recently acquired a bell gauge from an antique shop! Here is an illustration of one from an 1885 book:

Bell gauge illustration.
Mine is also a Walker brand one. They have a rather fine distinction, measuring with a ruler seems to suggest that numbers 19-22 are all close to a 3mm! Also 6 and 3 seem the same, as do 4 and 7, and 5 and 8, so I find it a little odd, but mine seems to match the picture, so I assume the middle ones were maybe wooden and the bottom edge ones bone or some such thing. Anyway, I found I did have a bone hook which fitted the number 20 hole, so I used that, even though my DK wool was surely thicker than the silk the pattern suggests. At the end it also suggests the bag can be made in wool as a carriage bag or as a pillow.
It also says the flowers make suitable tassels made on their own, so even though that is all I have done, I can still call the challenge complete.
For the third one, on the far left of the pic, the giant one, I had some super chunky in a fuchsia colour so I thought it would be fun to make a monster one! I used a 9mm hook.

Pale pink Victorian fuchsia.
Then I found some very fine yarn on spools which my Mum gave me, so I tried that also using the small bone hook. I think this is the most accurate one, although what I thought was wool was so squeaky I have no doubt it is actually acrylic. I like the effect of it on this scale, so although I have bought 3 colours of the DK wool intending to make the bag, I might actually make a finer one with some of these (there are quite a few different colours). This is the one on the far right of the bigger pic, which illustrates how much of a difference yarn makes to the size of the finished thing, as it uses the same hook as the one next to it.
Nearly forgot the HSF data!
The Challenge: Pink
Fabric: Various yarns, one wool, the rest acrylic.
Pattern: http://www.antiquepatternlibrary.org/pub/PDF/6-JA008Riego7.pdf
Year: 1850
Notions: bone crochet hook and a plastic one.
How historically accurate is it? The wool one is not bad, but the rest are acrylic, the pattern is original and the hook I used for 3 of them.
Hours to complete: Once I figured out the pattern it took about 1 hour for a flower.
First worn: Not.
Total cost: Small amounts of yarn, some from stash, so not much.
Wonderful Victorian Poem
I was looking through a Victorian magazine the other day (as you do, well as I do, I am rather addicted to them since I discovered them late last year) and I came across this fabulous poem which is so apt for the re-enactor and fan of wearing historical clothes.
I love the script and also the illustration – the old lady peering down her lorgnettes reminds me of the Dowager Lady Violet from Downton Abbey 🙂 I can just imagine her cutting remark. My scanner is not working since we “upgraded” to Windows 7 (not as much of a disimprovement as I expected, but this I hadn’t expected, and the printer is playing up too) so I had to photograph the page, making a shiny blob from the flash.

A Rhyme of no Consequence
A Rhyme of no Consequence
by Edith Brignall
1. I dressed myself in an old-world gown,
“Why should I not?” said I,
‘Tis the presttiest thing I have seen this Spring
With a world of gathers to fall and cling,
‘Tis fit to be worn by the queen of a king
Oh! I’ll set the fashion,” laughed I,
“The robesof the days gone by
Were lov’lier far, they had colour and grace
And deserved to be near to a maidens face
While ours of today! I sigh,”
Proud as could be was I
As down to the town in my old-world gown
I tripped as the folks came by.
2. But_never again_ah me, the pain!
Did you ever think to try
To alter a fashion from this to that,
To wear for example a Gainsborough hat
While those a la mode are petite and flat,
Did you ever think to try?
I nearly died, did I!
The whole world looked at me up and down
With something between a smile and a frown
Till I burned, I was so shy
In that dress of the days gone by
In that alien gown down there in the town
With so many passing by.
3.It is put away now in an old, old chest,
(Sufficient the reason why)
I never had courage to wear it again,
I walk in a dress that is rigid and plain
And think now and then of the horrible pain
I suffered when I was shy,
And never so much as try
To alter a fashion_the World may wear
Just what it wants to, for all I care
I follow without a sigh,
And yet-that gown of the days gone by
Looked sweet in the town though the folks did frown
At me as I passed them by.
It is from the Harmsworth Magazine volume 2 from 1899 which also has stories, pictures and fascinating articles on a range of subjects. Apparently the latest craze was a photograph album for the baby, documenting various stages of growing up, which people still do now (make baby albums that is, I guess they’ve always grown up, at least physically…). I might write further blog posts about various of these magazines, there is plenty of interesting material.
HSF Challenge 2: Innovation
The theme for this challenge is to make something which was an innovation in its day. My first thought was how fun it would be to make a Victorian bathing outfit, to celebrate how the innovation of sea bathing had become popular. But I don’t have a pattern for one and only two weeks before the challenge is due, I couldn’t order one in time, especially from across the pond. So that idea can wait for another challenge maybe 🙂
My next thought was that it was an innovation in early Victorian times to have published patterns and instructions for knitting and crochet, so I trawled free pdfs on these two fascinating sites to find something early that I wanted to make and thought was within my skill set.
http://www.southampton.ac.uk/library/ldu/wsa.html
http://www.antiquepatternlibrary.org/
The earliest ones are quite challenging as they tend not to provide pictures. Also the instructions, sometimes called receipts which is an old term for recipes, can be somewhat basic and confusing, assuming you know what they mean. For example, for night stockings, ’54 stitches on large pins, turning every other stitch, and lessening a little gradually towards the end.’ That’s it, that’s the whole instructions for that item. I guess you have to know what it is to look like, without a picture! The turning is another word for purl, so it’s basically a 1×1 rib, tapered, but then what?
That is from one of the very oldest, which itself claims to be the first, “The Ladies’ Knitting and Netting Book” published in London in 1838: ‘At a period when all Fancy Works are so justly appreciated, and highly patronized, it is presumed that this little volume, the only one hitherto published on this subject, may be valuable.’
It is from this book, then, that I wanted to find something to make. Since my arthritic knee has been playing up a lot in this cold weather, when I saw the pattern for ‘Knee Caps’ on p.10 of this little book, and it looked relatively doable, I decided I had my pattern.
‘Begin with 36 stitches; knit 8 or 12 rows, according to the size wished for; knit 15 stitches, make a stitch, knit 6, make a stitch, knit the rest. Add 2 in the same manner every other row until you have 52 on the needle. Knit 12 or 16 rows, and decrease in the same proportion in which you augmented. Sew the ends together.’
I found another book, an American edition from ten years later, which had many of the same patterns, including this one, verbatim but with the additional information that it should be worked on ‘very coarse needles’. Not knowing what constituted coarse in those days, I have begun my first attempt using brown DK felting wool and 4.5mm needles. Some of it can be judged as you go, so I can add rows, or leave rows out, as I choose. If it is totally wrong, I shall have to scrap it and start again in a different size. This slightly later book also has some definitions of terms so is more useful. I suppose that is also an innovation.

Early Victorian knee warmer, 1838
I began knitting and did the first 8 rows, but when I reached the instruction to make one, I had to check if they had a preferred way to do this. The early book did not say, the later one had instruction for both YO and knit in front and back loop, I took the easy option of YO, as you can see by the holes. Now I am going off to do more, as the cat has come to meow at me, saying she wants a cuddle 🙂
I found another knee cap pattern in a much later book, from 1886, which is more complicated, on p.53 of this book. It is a much smaller gauge, worked in the round, ribbed. I might try and make one to compare them, but for now the easier one will suffice.
Later update: I have now finished. I conclude that I did indeed have the wrong needle size. I was misled for quite a while, as the pattern produces a nice, kneecap shaped bulge of about the right size, but then I had to do lots of rows to get the ends to meet. The pattern implies no extra ones, though I suppose a very skinny person might just have managed, my knee gets quite swollen. I think it safe to assume that ‘coarse needles’ were bigger than 4.5mm in those days. I might try again some time and make one in chunky with 7mm needles (which would be more like a bent tube than a tube with a kneecap bulge), but this one works, fits and is comfortable, so I regard it as a success 😀
I did make one other minor change, in that I narrowed the bit under the knee slightly, to 30 stitches, and then increased it back to 36 sts. This saves it wrinkling. It does slip down a bit when walking. It is also a bit itchy. I dare say if it was worn over period stockings both problems might be solved. I made it as tight as I dared, since my knee is not so swollen today and it has to fit when swollen as that is when I will need it most!
The Challenge: Innovation (published knitting patterns)
Fabric: pure wool DK yarn, dark brown.
Pattern: “The Ladies’ Knitting and Netting Book”
Year: 1838
Notions: 4.5mm knitting needles, crochet hook to join together, scissors to cut yarn
How historically accurate is it? pretty accurate, except the gauge being way off, which must have happened then too!
Hours to complete: I forgot to count, several
First worn: today
Total cost:less than £1 because the yarn was a bargain.
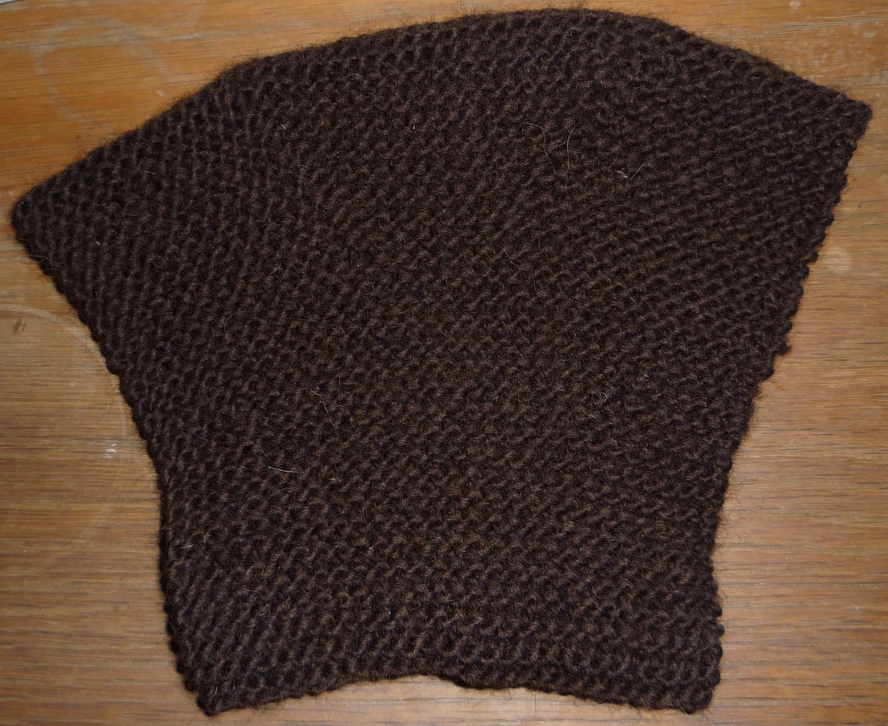
Knee warmer after being worn.
It looks a bit uneven here because I took it off for the photo and it is slightly stretched. Note the ubiquitous cat hair, as Pebble likes to help me knit by lying on me at awkward angles, and sometimes keeping my feet warm. I might have hoped tabby hair might not show up so much on brown…
This one shows the knee bulge:

Thee knee cap shaped bulge in the knitting.
